What are allocations?
Add bank account
Add virtual wallet
How to edit my allocation
How to delete any allocation
Changing allocations where there is only one set
When can I change my allocations?
What Wallets Can I Use with Bitwage?
WHAT ARE ALLOCATIONS?
Introduction: Allocations are a powerful tool from Bitwage that can help you manage your finances more efficiently.
Q: What are Allocations?
A: Allocations are the way you designate how much of your income goes to which wallets or bank accounts. You can allocate a percentage of multiple wallets or bank accounts, and we will automatically distribute your payment according to your specifications.
Q: Why do I need Allocations?
A: Allocations are necessary to ensure that your payments are distributed according to your preferences. Without allocations, all of your income would be sent to one default wallet or bank account, which may not be the most efficient way to manage your funds. With allocations, you can easily split your income between multiple accounts and wallets, making it easier to manage your finances.
Q: How do I set up Allocations?
A: Setting up allocations is easy in the “Bank Accounts and Wallet” section of your dashboard. First, you need to add your wallets or bank accounts. Once you have added your accounts/wallets use the slider tool to adjust your allocations.
Q: How many wallets and bank accounts can I use?
A: If you're a premium Bitwage user, you can receive your payment to any mix of up to 3 wallets/bank accounts. On the other hand, if you're a non-premium Bitwage user, you can set 1 wallet and 1 bank account in your allocations.
Q: Can I change my Allocations?
A: Yes, you can change your allocations at any time. Simply go to the "Bank Accounts and Wallets" section of your dashboard and edit your allocations as needed. Your changes will take effect on your next payment.
Q: What does inactive mean?
A: If an account or wallet is inactive that means it has been added to your allocations. You can find options to activate it in the allocations slider at the top of the "Bank Accounts and Wallets" page.
Q: What happens if I don't set up Allocations?
A: If you don't set up allocations, all of your income will be sent to your default wallet or bank account. This may not be the most efficient way to manage your funds, and you may miss out on opportunities to maximize your earnings. If you have no accounts or wallets added to Bitwage then we will not be able to send you payment.
Add Bank Accounts
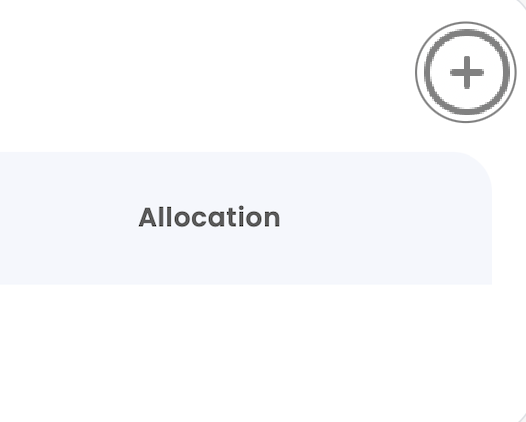
1. You need to navigate to the left sidebar menu and click on "Allocations." Once you do that, you will have the option to add bank accounts or virtual wallets.
1a. You need to navigate to the + icon located in the upper right corner.
2. You will see a pop-up menu like the one shown below:

3. We can send payments in USD, Euro, British Pound, or Mexican Peso depending on your preference!
3a. You will need to complete the information, and once you do, you will need to confirm it using a code that will be sent to your mobile phone.
4. Once you enter the code, you will be able to view the added bank account.
If the bank account you wish to add is in Argentine Pesos, please reach out to our support team for assistance.
Add Virtual Wallet
1. you need to navigate to the + icon located in the upper right corner, just like with bank accounts.
%207-16-52%E2%80%AFp-%C2%A0m--png-1.png?width=591&height=343&name=Captura%20de%20pantalla%202025-03-10%20a%20la(s)%207-16-52%E2%80%AFp-%C2%A0m--png-1.png)
2. You will need to choose based on the currency and network you wish to use, and be sure to review the associated fees.

3. You will need to enter the required information based on the selected currency.
3a. Once you have done that, you will need to enter the code that has been sent to your phone.
Then you will be able to view your added allocation.
How To Edit Your Allocations
Once you have added your allocations, you will be able to view them in your profile as follows!
Please note that you cannot remove an allocation if its status is active. To delete an allocation, it must be set to 0%.
1. At the top, you will see a bar displaying two distinct circles.
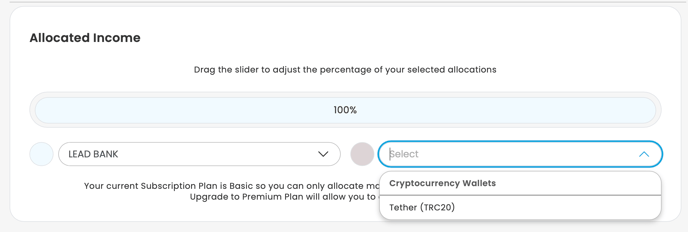
1a. By clicking on it, you will see your two allocations. In this case, select Tether (TRC20). A slider will appear above the bar, which you can move to adjust the percentage allocated to each option.
2. Once you have selected the percentage to allocate to each of your options, you must click on the blue button labeled "Save" located in the upper right corner of the bar.

3. Then you will be able to see your two active allocations with the percentages you specified!
%204-11-43%E2%80%AFp-%C2%A0m--png.png?width=688&height=373&name=Captura%20de%20pantalla%202025-05-05%20a%20la(s)%204-11-43%E2%80%AFp-%C2%A0m--png.png)
HOW TO DELETE YOUR ALLOCATION
To delete any allocation, you need to move the slider to one of the ends of the bar. Once you do that, click on the "Save" button to confirm your changes.
Any allocation that is set to 0% will display a trash can icon next to it, indicating that it can be deleted.%2011-01-57%E2%80%AFa-%C2%A0m--png.png?width=688&height=377&name=Captura%20de%20pantalla%202025-03-11%20a%20la(s)%2011-01-57%E2%80%AFa-%C2%A0m--png.png)
Clicking on the trash can icon will prompt a confirmation message.
Clicking on "Delete" will permanently remove the allocation!
Changing allocations where there is only one set
IF YOU WANT TO DELETE OR CHANGE YOUR ALLOCATION AND CURRENTLY HAVE ONLY ONE ALLOCATION IN YOUR PROFILE, YOU WILL NEED TO ADD A SECOND ALLOCATION. THE SYSTEM DOES NOT ALLOW YOUR PROFILE TO HAVE ZERO ALLOCATIONS.
You cannot delete your allocation where there is only one informed.
Bitwage does not do custody of funds. For that reason you cannot delete your allocation where there is only one informed.
This is the same whether you have an assigned bank account or a single virtual wallet.
If you have a bank account and you want to change or edit it, you will have to delete it, but as we mentioned the system does not allow it. Therefore you will have to add a second allocation, this can be an address you don't use. Cryptocurrency addresses can be obtained when you sign up for a wallet like Binance or Bitget for example.%209-31-39%E2%80%AFp-%C2%A0m--png.png?width=555&height=251&name=Captura%20de%20pantalla%202025-05-05%20a%20la(s)%209-31-39%E2%80%AFp-%C2%A0m--png.png)
For example, if we have a bank account and we need to edit or change it, we need to add a second allocation, either another bank account or a virtual wallet.
If we do not do this, the arrow to set the allocation to 0% will not appear. %209-42-02%E2%80%AFp-%C2%A0m--png.png?width=688&height=351&name=Captura%20de%20pantalla%202025-05-05%20a%20la(s)%209-42-02%E2%80%AFp-%C2%A0m--png.png)
Once you add a wallet or bank account you will be able to select it and once you do so the black arrow will appear. 
Once you do this you will see that each roundel below the bar has a color which indicates on the bar what the allocation will be, in this case I move the arrow 100% to my wallet because I want to edit or change my bank account.%209-45-01%E2%80%AFp-%C2%A0m--png.png?width=607&height=202&name=Captura%20de%20pantalla%202025-05-05%20a%20la(s)%209-45-01%E2%80%AFp-%C2%A0m--png.png)
Once you do this you will see that each roundel below the bar has a color which indicates on the bar what the allocation will be, in this case I move the arrow 100% to my left designating the wallet that will be active, this is because I want to edit or change my bank account. Don't forget to click the save button!!!
And now you can delete the allocation to add it again in case you need to edit it. Once you have done that you will have to delete the second allocation and we have already seen that before!
WHEN CAN I CHANGE MY ALLOCATIONS?
The best time to update allocations is before a payment is marked received.
- When a payment is marked as received, the allocations are locked in. This allows us to proceed with our trades, exchanges, and conversions for the day.
- If you do update allocations mid payment the payment in processing will go to your previous elections, and your next payment will go to your new elections.
What Wallets Can I Use with Bitwage?
You can choose any wallet, provided it is compatible with the cryptocurrency you select. This includes exchanges, self-custodial wallets, and cold wallets, among others.